To confirm how many credits you have available on your dashboard, on the top right hand corner of your dashboard you will see "X Credits". You may also make a new purchase or access your Purchase History:
- If you need to purchase additional rooms/credits, you can do this in your dashboard by clicking the red 'New Purchase' button. Click here for an additional explanation!
- Click 'See Purchase History' for access to past purchases
Ready?!? Alright - let's go!
Check out our explainer video below, or, continue reading for a written guide.
1. Create an Event
-
- Open your Event Manager Dashboard
- Choose an Experience for your group
- Select from the Format options - In-Person or Hybrid
- Select from the Host Options - On Site, On Screen, or Self Hosted
- Edit from the available Event Details - Attendees, Duration & Location
- For On Screen or Self Hosted events, you will be able to self-schedule with the date, time, and timezone
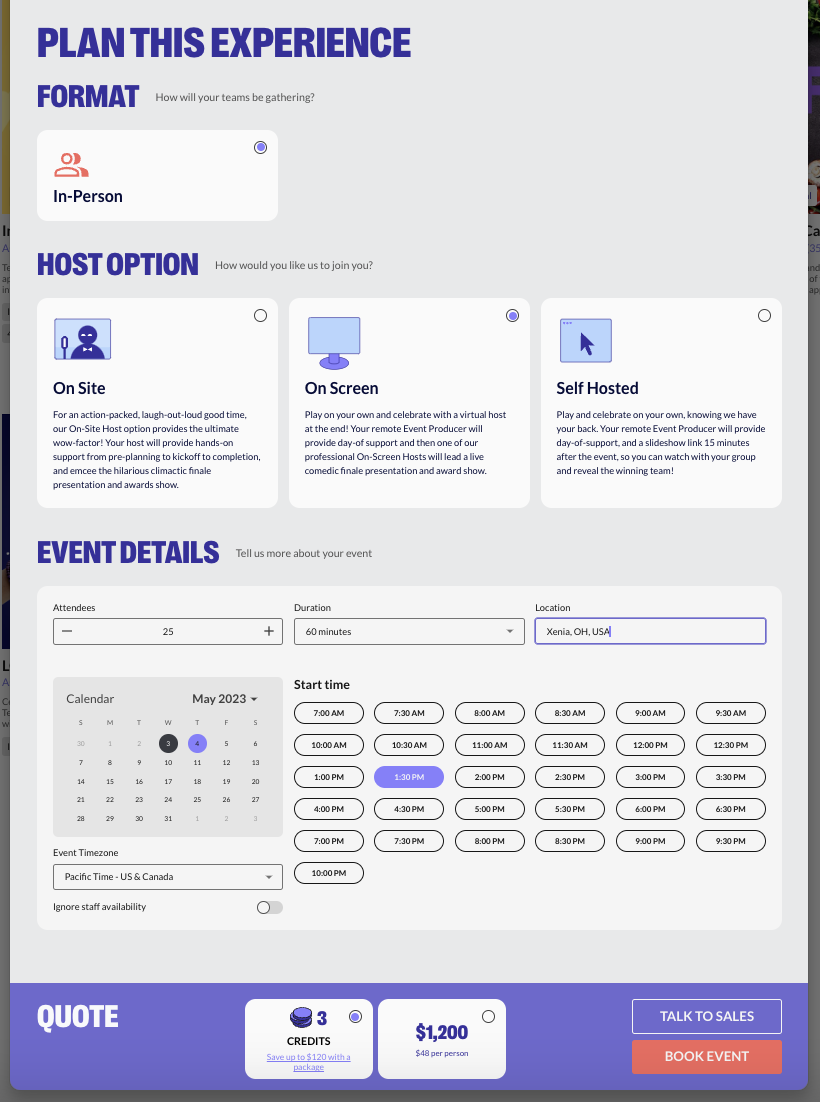
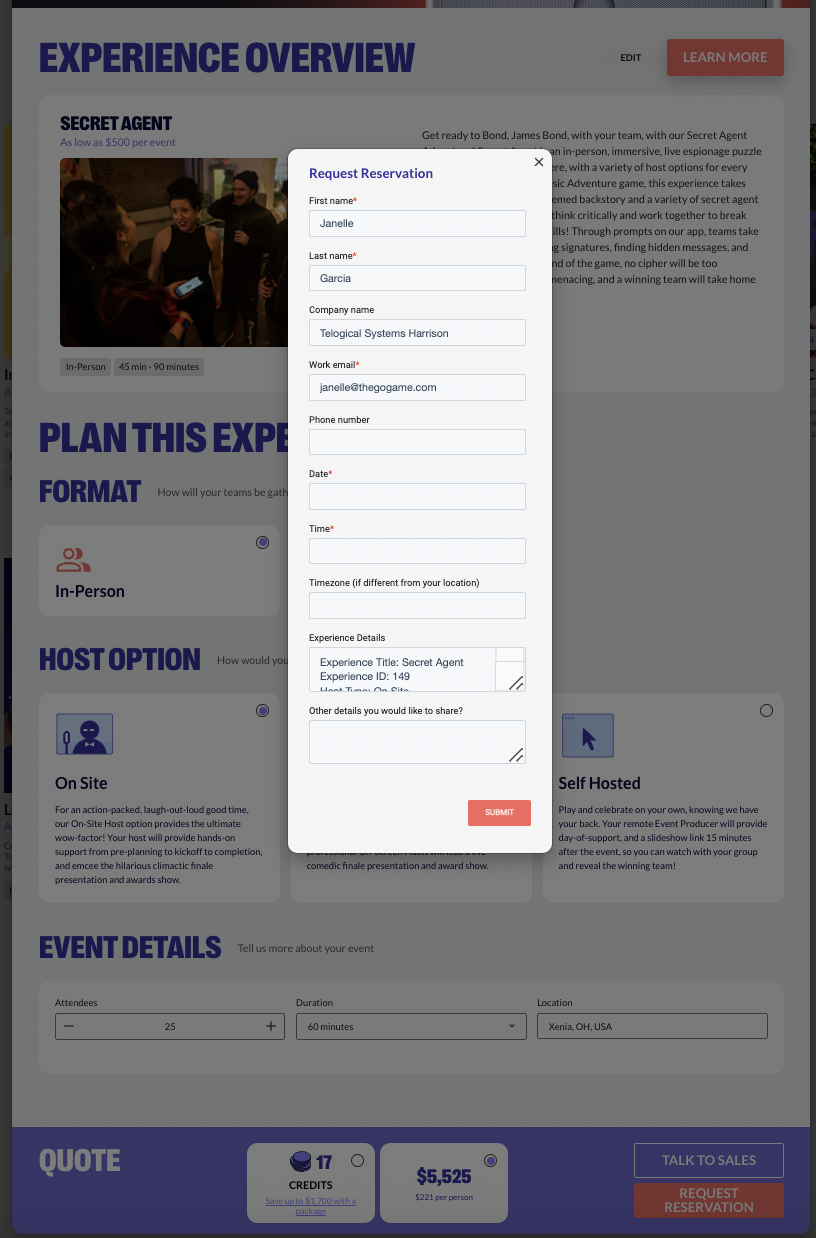
- For an On Site host event, you will be prompted to "Request Reservation". Submit a request and if approved, you will be notified via email with your next steps.
- If applicable, select from the available Customization options - Standard, Pro, or Premium
- Look at the Quote and:
- 'Credits' & Book Event
- Pay the dollar amount without credits
- 'Request Reservation' for an On Sire Host
- 'Talk To Sales' for more information
- For On Screen or Self Hosted events, you will be able to self-schedule with the date, time, and timezone
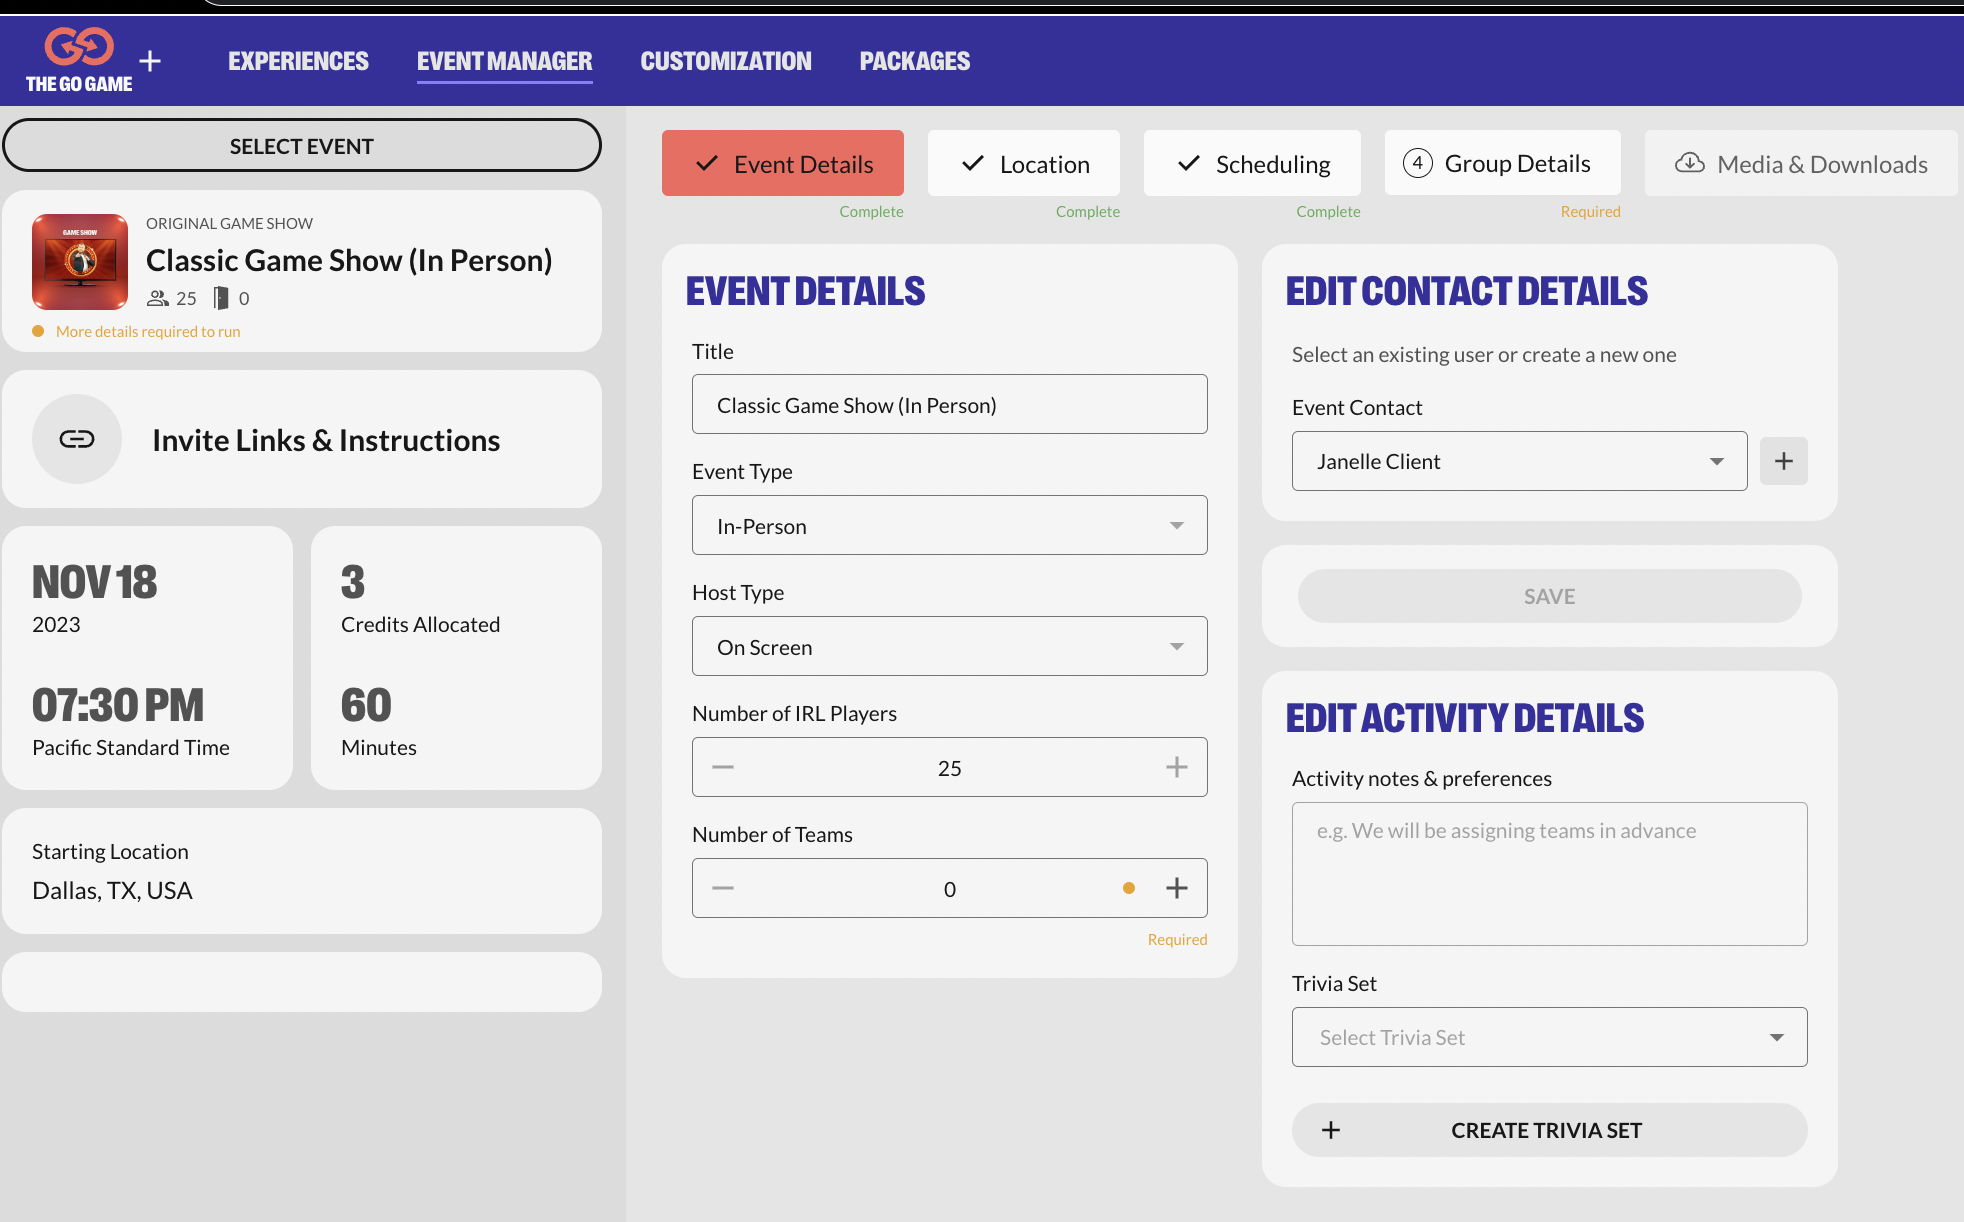
2. Event Details
Once your event is scheduled or approved...
-
- Under 'Edit Event Details':
- Title- you have the option to edit the Title of your event
- Event Type - Tells you how your group is joining us
- Host Type - Tells you how we will join you
- Attendees- You can edit up to the max allowed number of attendees for your allocated number of credits
- Under 'Edit Event Details':
- Edit Contact Details- You have the option to include someone else as the contact to be included in the auto emails
Click 'Save'
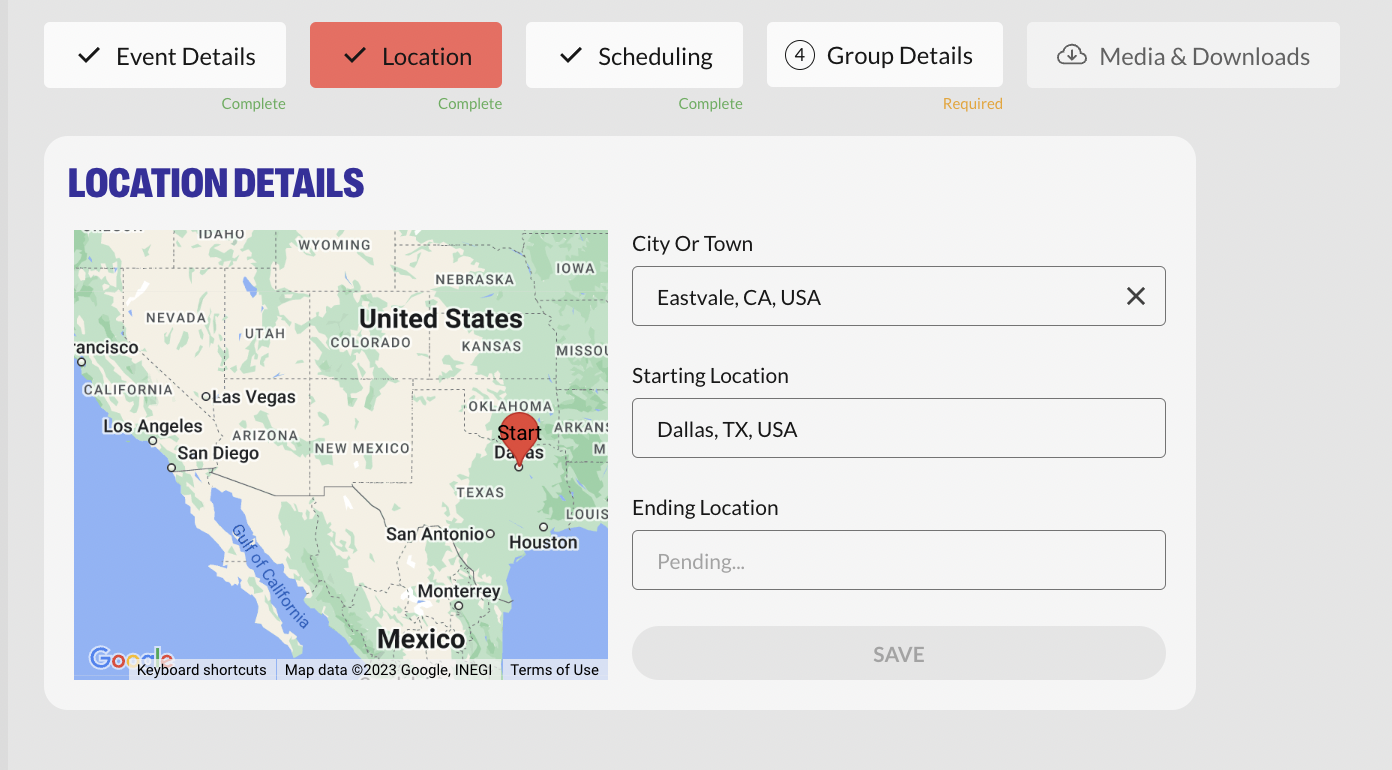
3. Location
This will show you your City or Town & Starting Location. The Ending Location will be submitted by your Event Producer after you have discussed this with your Event Producer directly.
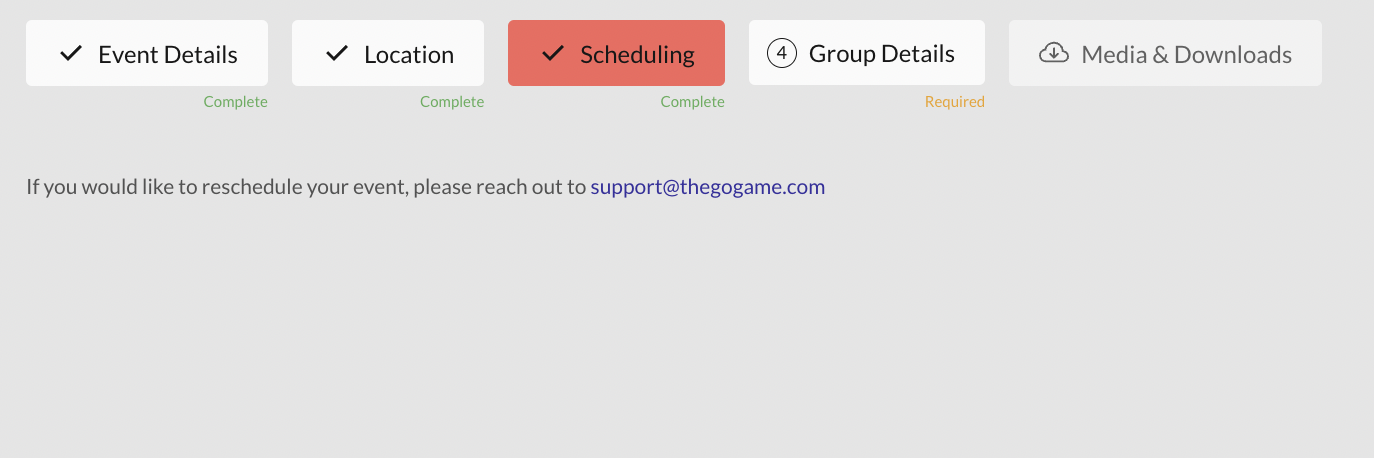
4. Scheduling
This is the rescheduling tab - you can reach out to support@thegogame.com for rescheduling options.
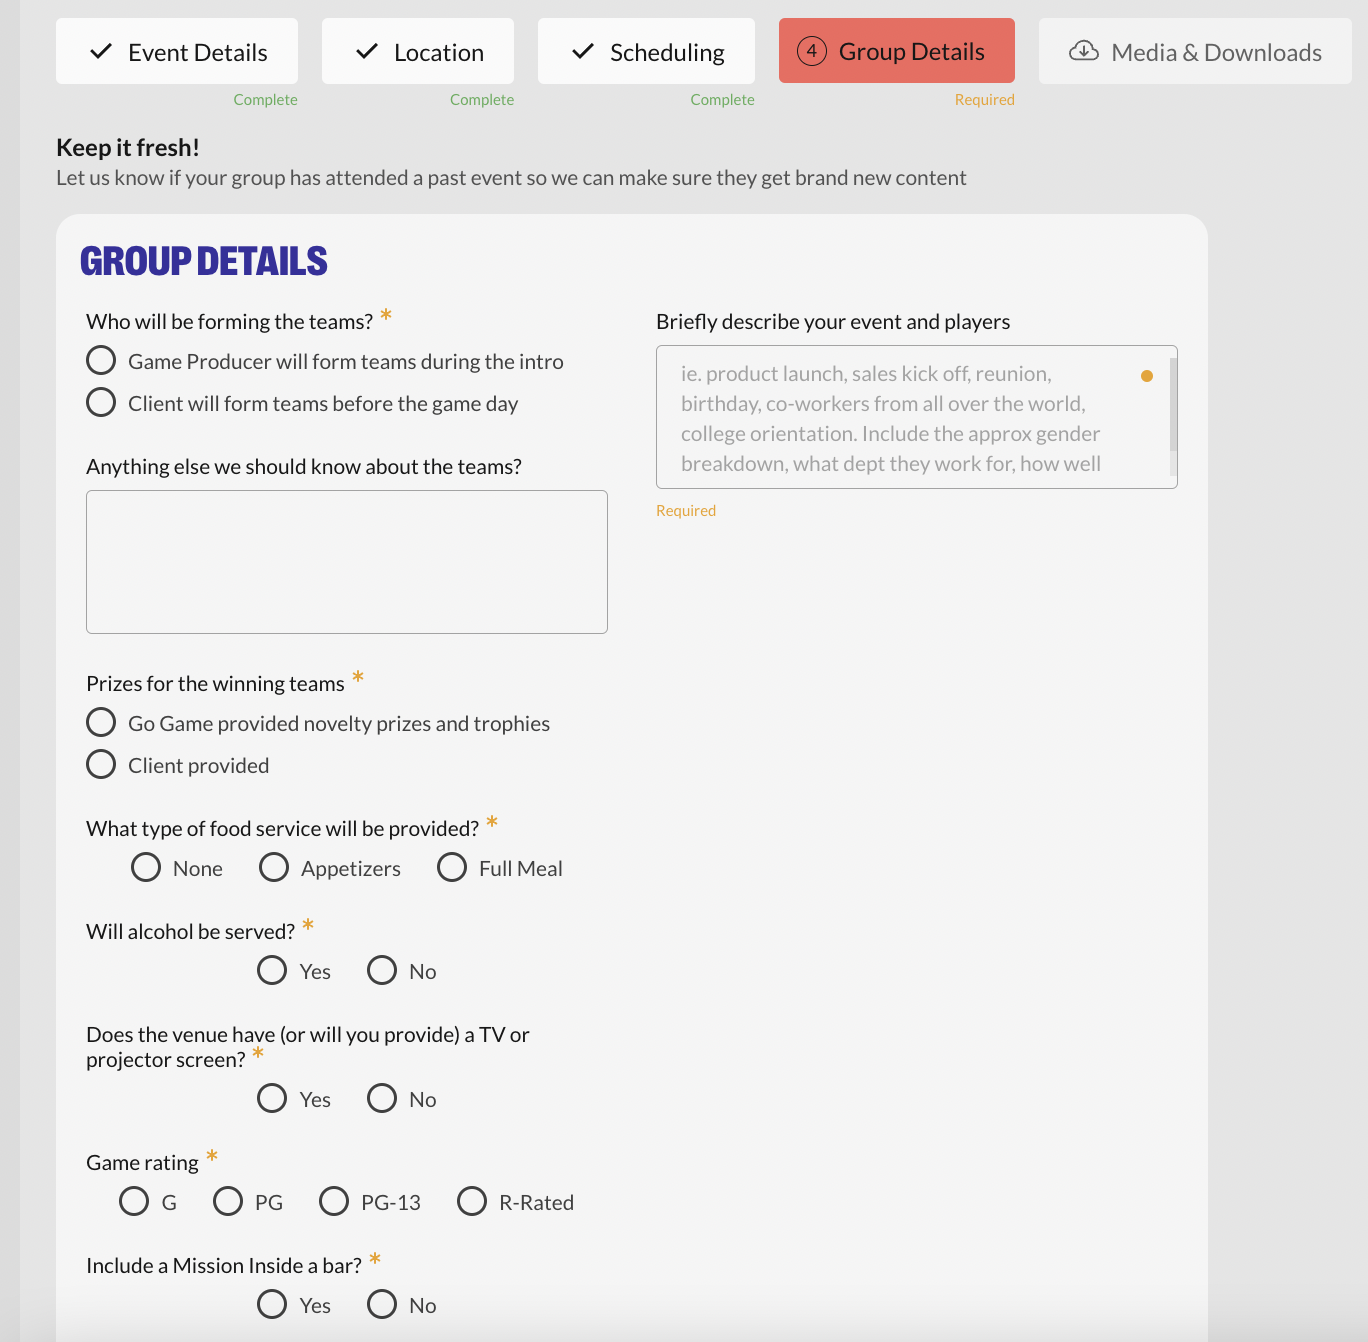
4. Group Details
-
- Tell us if your group has played in the past, if they are international, and more about your group! This information will help your Event Producer ensure the best experience for your group.
- Click 'Save & Submit Responses'
Tip: Upon scheduling an event, you have immediate access to the complete instructions & other useful tools for your attendees.
Tip: Look for the green "Event is Ready to Run" message on the left, and 3 green 'Complete' indications for each step. This ensures we have the required information to produce your event!